블로그

  • Is Remix.js a framework or a library?

    A framework provides a complete structure and set of conventions to build an application.

    Remix.js is a Framework because:

    1. Routing and File-Based Structure

      • Uses a file-based routing system
      • Provides nested routes, layout routing, and error boundaries as core concepts.

      2. Data Handling

      • Has a build-in data loader system via loader() and action() functions, which lets you manage server-side rendering and from submissions declaratively.

      3. Full Stack Capabilities

      • Remix.js is full stack: it manages both frontend and backend logic (including fetching, mutations, and authentication).
      • Can be deployed on many backends: Express, Vercel, Cloudflare Workers, etc.

      4. Build-in Optimization

      • Provides intelligence resource preloading, streaming and caching out-of-the-box.

      5. Opinionated Project Structure

      • Remix.js dictates how your app should be structured (e.g., /routes, /app), which is a sign of a framework, not just a resuable library.

      Summary:

      • Remix.js is a framework – specifically a modern, full-stack, React-based web framework designed for performance and developer experence.
    1. 이제부터 에러는 무섭지 않다! AutoHotkey v2로 예외 다루기

      개발을 하다 보면 피할 수 없는 존재, 바로 ‘에러(Exception)’입니다. 하지만 에러가 난다고 두려워할 필요는 없습니다. AutoHotkey v2에서는 예외 처리가 간단하면서도 강력하게 개선되었습니다. 이번 글에서는 AutoHotkey v2의 예외 처리 방법을 명쾌하게 정리하여, 여러분의 자동화 스크립트가 더욱 견고해지도록 도와드리겠습니다.

      1. 간결하고 직관적인 try-catch 문법

      AutoHotkey v2에서는 try-catch 구조를 활용하여 손쉽게 예외를 처리할 수 있습니다.

      Bash
      try {
          FileRead("없는파일.txt")
      }
      catch as e {
          MsgBox("에러 발생: " e.Message " (" e.Line "번째 줄)")
      }
      Bash

      2. 에러의 모든 정보를 담고 있는 Exception 객체

      발생한 에러를 더욱 깊이 이해할 수 있는 Exception 객체의 유용한 속성을 살펴보세요.

      • e.Message: 에러 설명
      • e.What: 실패한 명령어
      • e.File: 에러 발생 파일
      • e.Line: 에러가 발생한 줄 번호
      Bash
      try {
          value := ObjGet("invalid.file")
      }
      catch as e {
          MsgBox("에러 메시지: " e.Message
                 "\n명령어: " e.What
                 "\n파일: " e.File
                 "\n줄 번호: " e.Line)
      }
      Bash

      3. 나만의 예외 직접 던지기

      커스텀 예외를 정의해 더욱 명확한 코드 작성이 가능합니다.

      Bash
      try {
          Throw Error("내가 정의한 커스텀 에러입니다!", -1, "상세한 추가 정보")
      }
      catch as e {
          MsgBox("예외 발생: " e.Message "\n추가 정보: " e.Extra)
      }
      Bash

      4. 놓치지 않고 실행하는 finally

      에러 발생 여부와 관계없이 꼭 수행해야 하는 작업을 finally에서 처리하세요.

      Bash
      try {
          result := 1 / 0
      }
      catch as e {
          MsgBox("예외: " e.Message)
      }
      finally {
          MsgBox("finally 블록은 항상 실행됩니다!")
      }
      Bash

      마무리하며

      예외 처리를 잘 활용하면 자동화 작업의 안정성이 크게 높아집니다. AutoHotkey v2의 예외 처리 방식을 마스터하여, 예측 불가능한 상황에도 당황하지 않고 멋지게 대응해 보세요!

    2. CMake Quick Guide

      1. 개요

      CMake는 C/C++ 등 여러 프로그래밍 언어로 작성된 프로젝트의 빌드 자동화 도구입니다. GNU Make나 Ninja 같은 하위 빌드 시스템의 설정 파일을 생성하는 메타 빌드 시스템(Meta Build System) 이라고 할 수 있습니다.

      2. CMake의 핵심 개념

      2.1. CMakeLists.txt

      • CMake 프로젝트는 이 파일을 중심으로 구성됩니다.
      • 빌드 설정, 소스 코드 목록, 컴파일 옵션 등을 명시합니다.

      2.2. 빌드 디렉토리 분리 (Out-of-source build)

      • 소스 코드와 빌드 결과물을 분리하여 관리 가능
      • 예:
      Bash
      mkdir build
      cd build
      cmake ..
      make
      Bash

      2.3. 다양한 플랫폼 지원

      • Windows, macOS, Linux 등에서 동일한 CMakeLists.txt로 빌드 구성 가능
      • Visual Studio, Makefile, Ninja 등 다양한 빌드 시스템을 지원

      3. 주요 명령어

      명령어설명
      cmake .현재 디렉토리의 CMakeLists.txt를 바탕으로 빌드 설정 생성
      cmake ..상위 디렉토리의 CMakeLists.txt를 사용해 빌드 설정 생성
      make생성된 Makefile로 실제 빌드 수행
      cmake --build .플랫폼 독립적 빌드 명령

      4. 주요 기능

      • install, test, configure_file 등 다양한 프로젝트 관리 기능 내장
      • find_package로 외부 라이브러리 탐색
      • target_link_libraries로 라이브러리 연결
      • option, if 등을 활용한 조건부 설정

      5. 예시 프로젝트 구조

      Bash
      MyProject/
      ├── CMakeLists.txt
      ├── main.cpp
      ├── utils.cpp
      └── build/      # 빌드 파일 생성 위치 (Out-of-source build)
      Bash

      6. CMake의 장점

      • 다양한 옵션 제공: 테스트, 설치, 패키징 등 통합 관리
      • 유지보수 용이: 큰 프로젝트에서도 구성 관리가 쉬움
      • 크로스 플랫폼: 다양한 OS 및 빌드 도구에 대응
      • 모듈화: 서브 디렉토리 단위 구성 가능
    3. CMake Quick Guide (with docker compose)

      1. 개요

      CMake는 C/C++ 등 여러 프로그래밍 언어로 작성된 프로젝트의 빌드 자동화 도구입니다. GNU Make나 Ninja 같은 하위 빌드 시스템의 설정 파일을 생성하는 메타 빌드 시스템(Meta Build System) 이라고 할 수 있습니다.

      2. CMake의 핵심 개념

      2.1. CMakeLists.txt

      • CMake 프로젝트는 이 파일을 중심으로 구성됩니다.
      • 빌드 설정, 소스 코드 목록, 컴파일 옵션 등을 명시합니다.

      2.2. 빌드 디렉토리 분리 (Out-of-source build)

      • 소스 코드와 빌드 결과물을 분리하여 관리 가능
      • 예:
      Bash
      mkdir build
      cd build
      cmake ..
      make
      Bash

      2.3. 다양한 플랫폼 지원

      • Windows, macOS, Linux 등에서 동일한 CMakeLists.txt로 빌드 구성 가능
      • Visual Studio, Makefile, Ninja 등 다양한 빌드 시스템을 지원

      3. 주요 명령어

      명령어설명
      cmake .현재 디렉토리의 CMakeLists.txt를 바탕으로 빌드 설정 생성
      cmake ..상위 디렉토리의 CMakeLists.txt를 사용해 빌드 설정 생성
      make생성된 Makefile로 실제 빌드 수행
      cmake --build .플랫폼 독립적 빌드 명령

      4. 주요 기능

      • install, test, configure_file 등 다양한 프로젝트 관리 기능 내장
      • find_package로 외부 라이브러리 탐색
      • target_link_libraries로 라이브러리 연결
      • option, if 등을 활용한 조건부 설정

      5. 예시 프로젝트 구조

      Bash
      MyCMakeWithDockerCompose/
      ├── app/
         ├── CMakeLists.txt
         └── hello-world.cpp
      └── docker-compose.yml
      Bash

      app/CMakeLists.txt:

      CMake
      cmake_minimum_required(VERSION 3.10)
      
      set(CMAKE_C_COMPILER "/usr/bin/gcc")
      set(CMAKE_CXX_COMPILER "/usr/bin/g++")
      
      project(HelloWorld)
      
      add_executable(HelloWorld hello-world.cpp)
      CMake

      app/hello-world.cpp:

      C++
      #include <iostream>
      
      int main() {
          std::cout << "Hello, World!" << std::endl;
          return 0;
      }
      C++

      docker-compose.yml:

      YAML
      services:
        hello-cmake:
          image: ubuntu:18.04
          container_name: hello-cmake
          volumes:
            - type: bind
              source: ./app
              target: /app
          working_dir: /app
          command: >
            bash -c "
              apt update &&
              apt install -y cmake build-essential &&
              mkdir -p build &&
              cd build &&
              cmake .. &&
              make
            "
      YAML

      6. 예시 프로젝트 빌드

      Bash
      root@centricone:~/MyCMakeWithDockerCompose# docker compose up
      [+] Running 1/1
        Container hello-cmake  Created
      Attaching to hello-cmake
      hello-cmake  | 
      
      ...... 생략 ......
      
      hello-cmake  | [100%] Linking CXX executable HelloWorld
      hello-cmake  | [100%] Built target HelloWorld
      hello-cmake exited with code 0
      root@centricone:~/MyCMakeWithDockerCompose# ls -l app/build/
      total 40
      -rw-r--r-- 1 root root 12200 May 19 02:14 CMakeCache.txt     
      drwxr-xr-x 5 root root  4096 May 19 02:15 CMakeFiles
      -rw-r--r-- 1 root root  1460 May 19 02:14 cmake_install.cmake
      -rwxr-xr-x 1 root root  8928 May 19 02:14 HelloWorld
      -rw-r--r-- 1 root root  4839 May 19 02:15 Makefile
      root@centricone:~/MyCMakeWithDockerCompose/app# ./build/HelloWorld 
      Hello, World!
      root@centricone:~/MyCMakeWithDockerCompose#
      Bash

      1: 도커 컨테이너 실행

      12: 빌드내용 확인을 위해 디렉터리 조회

      17: 빌드된 HelloWorld 바이너리

      7. CMake의 장점

      • 다양한 옵션 제공: 테스트, 설치, 패키징 등 통합 관리
      • 유지보수 용이: 큰 프로젝트에서도 구성 관리가 쉬움
      • 크로스 플랫폼: 다양한 OS 및 빌드 도구에 대응
      • 모듈화: 서브 디렉토리 단위 구성 가능

    4. Linux – Service and Daemons

      1. SysVinit서비스

      • /etc/init.d : SysVinit(Unix System Five Init) 기반의 Linux 시스템에서 시스템 서비스(데몬)를 관리하는 스크립트들이 위치하는 디렉터리
      • 서비스(daemon)의 시작(start), 정지(stop), 재시작(restart) 등을 제어하기 위한 실행 스크립트 모음이 저장된 디렉토리
      • 스크립트는 start, stop, restart, status 등의 서브 커맨드를 지원
      • 대부분의 최신 Linux 배포판(Ubuntu 16.04+, Debian Jessie+, CentOS 7+)에서는 /etc/init.d 대신 **systemd**가 사용

      2. systemctl

      • /etc/systemd/system 디렉토리에 명세파일이 존재
      • systemd라는 시스템 및 서비스 관리자를 기반으로 작동
      • 현재 대부분의 리눅스 배포판(Ubuntu, CentOS, Debian, Fedora 등)에서 systemd가 기본 init 시스템으로 사용

      example – vsftpd’s status:

      Bash
      # systemctl status vsftpd
       vsftpd.service - vsftpd FTP server
           Loaded: loaded (/lib/systemd/system/vsftpd.service; enabled; vendor preset: enabled)
           Active: active (running) since Mon 2025-04-28 07:30:24 UTC; 1 week 2 days ago
         Main PID: 928 (vsftpd)
            Tasks: 1 (limit: 76878)
           Memory: 14.2M
              CPU: 1min 48.897s
           CGroup: /system.slice/vsftpd.service
                   └─928 /usr/sbin/vsftpd /etc/vsftpd.conf
      
      Apr 28 07:30:24 centricone systemd[1]: Starting vsftpd FTP server...
      Apr 28 07:30:24 centricone systemd[1]: Started vsftpd FTP server.
      root@centricone:~# 
      Bash

      예시 데몬:

      • *d: httpd, sshd, ftpd, vsftpd, proftpd, mariadbd, mysqld

      3. systemctl 명령

      • systemctlsystemd 데몬을 제어하는 명령줄 도구
      • 주로 서비스 시작/중지, 부팅 시 자동 실행 설정, 상태 확인, 로그 조회 등을 관리합니다.
      • init.dservice 명령의 대체 명령(init.d의 service 명령은 구식)

      4. systemctl 서비스 제어 명령

      명령어설명
      systemctl start [서비스명]서비스 시작
      systemctl stop [서비스명]서비스 중지
      systemctl restart [서비스명]서비스 재시작
      systemctl reload [서비스명]설정만 다시 읽기 (재시작 없이)
      systemctl status [서비스명]서비스 상태 확인
      systemctl enable [서비스명]부팅 시 자동 시작 설정
      systemctl disable [서비스명]자동 시작 비활성화
      systemctl is-enabled [서비스명]현재 자동 시작 여부 확인
      systemctl mask [서비스명]서비스 실행 완전 차단 (시작 불가)
      systemctl unmask [서비스명]mask 해제 (다시 실행 가능하게)

      5. systemctl 전체 시스템 관리 명령

      명령어설명
      systemctl list-units --type=service실행 중인 서비스 목록
      systemctl list-unit-files설치된 서비스 목록과 활성화 상태
      systemctl reboot시스템 재부팅
      systemctl poweroff시스템 종료
      systemctl suspend시스템 절전 모드
      systemctl halt시스템 정지 (전원은 켜짐)
      systemctl isolate [타겟명]런레벨(타겟) 전환 (예: multi-user → graphical)

      6. 서비스 예시

      Bash
      systemctl start nginx          # nginx 서버 시작
      systemctl status sshd         # SSH 서비스 상태 확인
      systemctl enable apache2      # 부팅 시 아파치 자동 시작
      systemctl stop firewalld      # 방화벽 서비스 중지
      systemctl restart NetworkManager
      Bash

    5. Linux – Network-related Commands

      1. 네트워크 정보 확인

      • ip, ifconfig, arp, nslookup
      Bash
      ip addr            # IP 주소 및 인터페이스 정보 확인
      ip link	           # 인터페이스 상태 및 MAC 주소 확인
      ifconfig           # 예전방식의 IP 주소 및 인터페이스 정보 확인
      arp -a             # ARP (Address Resolution Protocol) 캐시 테이블 조회
      ip neigh           # ARP (Address Resolution Protocol) 캐시 테이블 조회
      nslookup           # dns 정보 조회
      ifconfig          # 인터페이스별 IP, MAC, 상태 확인
      ifconfig eth0 up  # 인터페이스 활성화
      ifconfig eth0 down # 인터페이스 비활성화
      Bash


      2. 네트워크 확인 및 진단

      Bash
      ping	        # ICMP 패킷을 통해 호스트와 연결 여부 확인
      traceroute	  # 패킷의 경로(라우터 hop)를 추적
      tracepath	    # 유사한 기능, 비root 환경에서 사용 가능
      Bash

      2.1. 연결상태 진단

      • ss : socket statistics
      Bash
      ss -tuln            # 열려 있는 TCP/UDP 포트 확인
      ss -pant            # 포트 + 프로세스 정보
      Bash
      • netstat
      Bash
      netstat -anp
      Bash


      2.1. 웹페이지 또는 웹애플리케이션 진단

      • wget, curl
      Bash
      curl	        # HTTP 요청 테스트	curl -I http://example.com
      wget	        # 파일 다운로드 및 HTTP 상태 확인	wget http://example.com
      curl http://example.com
      wget http://example.com
      Bash
      • 웹 요청 전송 및 응답 확인 (HTTP 테스트)
      • curl -I : 헤더만 보기


      3. 방화벽

      • UFW (Uncomplicated Firewall)
      Bash
      sudo ufw enable                # 방화벽 활성화
      sudo ufw status                # 현재 상태 확인
      sudo ufw allow 22              # SSH 허용
      sudo ufw deny 80               # HTTP 차단
      sudo ufw delete allow 22       # 규칙 삭제
      sudo ufw default deny incoming # 기본 정책 설정
      Bash
      • ssh 서버로만 incoming 접속을 허용하는 방화벽 설정
      Bash
      sudo ufw default deny incoming
      sudo ufw default allow outgoing
      sudo ufw allow 22/tcp
      sudo ufw enable
      Bash
      • 주의! : 간편하지만 위험
      Bash
      sudo ufw disable
      Bash

      4. 네트워크 관련 파일

      • /etc/hosts : 로컬 파일에 저장된 호스트 이름
      • /etc/hostname : 해당 서버의 호스트 이름
      • /etc/services : 포트별 서비스 이름
        • 포트 번호와 서비스 이름의 매핑 정보 제공
      • /etc/resolv.conf
        • DNS 서버 주소를 지정하는 파일 (이름 해석용)

      5. netcat을 이용한 서버/클라이언트 시험

      Bash
      netcat -lvvp 8080        # 서버 실행
      telnet ipaddr 8080       # 접속
      (웹브라우저로 접속)
      Bash

    6. Linux – Shell Scripting


      1. 쉘(Shell)이란?

      • 쉘(Shell)은 사용자와 커널 사이의 인터페이스로, 명령어를 입력하면 커널이 수행할 수 있도록 해주는 프로그램
      • 리눅스에서 가장 많이 사용되는 쉘은 bash (Bourne Again SHell)


      2. 쉘 스크립트란?

      • 쉘 스크립트(Shell Script)는 쉘 명령어들을 모아 놓은 텍스트 파일
      • 즉, 사람이 매번 입력하는 명령어들을 자동으로 순서대로 실행할 수 있도록 작성한 자동화 프로그램
      • 확장자는 .sh가 일반적이지만 필수는 아님


      3. 기본 예제

      Bash
      #!/bin/bash
      # 위의 줄은 shebang, 스크립트를 bash로 실행한다는 의미
      
      echo "Hello, World!"
      Bash
      • #!/bin/bash: bash 쉘로 실행하도록 지정
      • echo: 문자열 출력


      3.1. 실행 방법

      Bash
      chmod +x script.sh     # 실행 권한 부여
      ./script.sh            # 실행
      Bash


      4. 주요 문법

      4.1. 변수 선언

      Bash
      NAME="Danny"
      echo "Hello, $NAME"
      Bash
      • 변수명은 공백 없이 =로 할당
      • $변수명으로 접근

      4.2. 명령 실행 파라미터

      Bash
      ./myscript.sh arg1 arg2 arg3
      Bash
      표현의미
      $0스크립트 이름 (myscript.sh)
      $1, $2첫 번째, 두 번째 인자
      $#인자의 개수
      $@인자 전체 목록 (각각 독립적으로 처리됨)
      $*인자 전체 목록 (하나의 문자열로 처리됨)


      4.3. 조건문 (if)

      Bash
      #!/bin/bash
      
      AGE=10
      
      if [ $AGE -ge 18 ]; then
          echo "Adult"
      else
          echo "Minor"
      fi
      Bash
      • [ 조건식 ] 또는 [[ 조건식 ]]
      • 숫자 비교 연산자: -eq, -ne, -lt, -le, -gt, -ge
      • 문자열 비교: =, !=
      Bash
      #!/bin/bash
      
      STRING1=abcde
      
      if [ "$STR1"="abcde" ]; then
        echo "is 'abcde'"
      else
        echo "not 'abcde'"
      fi
      Bash


      4.4. 반복문 (for, while)

      for문 예시:

      Bash
      #!/bin/bash
      
      for FILE in *.txt
      do
          echo "Processing $FILE"
      done
      Bash

      실행 결과:

      Bash
      $ ls -l
      run.sh         a.txt        b.txt        c.txt 
      $ bash run.sh
      Processing a.txt
      Processing b.txt
      Processing c.txt
      $
      Bash


      while문 예시:

      Bash
      COUNT=1
      while [ $COUNT -le 5 ]
      do
          echo "Count: $COUNT"
          COUNT=$((COUNT+1))
      done
      Bash


      4.5. 사용자 입력 받기

      Bash
      read -p "Enter your name: " USERNAME
      echo "Welcome, $USERNAME"
      Bash


      5. 변수, 환경변수

      5.1. Common Bash Environment Variables

      VariablePurpose
      PATHList of directories for finding executables
      HOMECurrent user’s home directory
      USERCurrent logged-in user
      PWDPresent working directory
      SHELLPath to the current shell
      LANGLanguage and locale
      EDITORDefault text editor (e.g., vim, nano)
      TERMTerminal type (e.g., xterm-256color)


      5.2. 변수 값 출력하기

      Bash
      echo $HOME
      Bash


      5.3. 변수 생성하기

      Bash
      MY_NAME="Danny"
      Bash


      5.4. 변수를 환경변수로 만들기

      Bash
      export MY_NAME
      Bash
      • 자식 프로세스에게도 환경변수가 전달됨


      6. 함수 정의

      • 자주 사용하는 코드를 함수로 정의하여 사용
      Bash
      function fname() {
        echo $1
      }
      
      fname "1"
      fname "2"
      fname "3"
      Bash
      • $1, $2 …은 함수 인자

      Bash
      $ bash run.sh
      1
      2
      3 
      Bash

      6.1. 함수 내 로컬 변수

      • 함수 내에서만 존재하고 실행 후에는 사라지는 변수
      Bash
      #!/bin/bash
      
      function fname() {
        local a=100
        echo $a
      }
      
      fname 
      echo $a
      fname
      fname
      Bash

      Bash
      $ bash run.sh
      100
      
      100
      100
      $ 
      Bash

      6.3. $? : exit status

      • command’s return value
      Bash
      $ ls /aaa
      ls: cannot access '/aaa': No such file or directory
      $ echo $?
      2
      
      $ ls /etc/passwd
      /etc/passwd
      $ echo $?
      0
      
      $ cat run.sh
      exit 100
      $ bash run.sh
      $ echo $?
      100
      Bash
      • function’s return value
      Bash
      #!/bin/bash
      
      function isBiggerThan100() {
        if [ $1 -gt 100 ]; then
          return 1
        else
          return 0
        fi
      }
      
      isBiggerThan100 99
      echo $?
      isBiggerThan100 101
      echo $?
      Bash

      실행결과:

      Bash
      $ bash f.sh
      0
      1
      Bash


      7. Linux Shell Command Operators

      • > / >> (Output Redirection)
      • 2>2>&1&>, etc. (Error redirection) 
      • < (Input Redirection)
      • && (AND)
      • || (OR)
      • & (Background)
      • ; (Sequential execution)
      • () (Subshell)
      • {} (Command group in current shell)
      • | (Pipe)


      8. 실용 예제


      8.1. 프로세스 자동 재시작

      Bash
      #!/bin/bash
      if ! pgrep nginx > /dev/null
      then
          echo "Nginx is not running. Restarting..."
          systemctl start nginx
      fi
      Bash


    7. Linux – commands & options

      1. 기본 개념: 옵션(Options)이란?

      옵션은 명령어의 동작 방식을 조정하는 부가적인 설정값

      2. Short Options (-x 형식)

      항목설명
      형식- + 한 글자 (-a, -l 등)
      특징짧고 간단하며 하나의 문자만 허용
      조합 가능 여부여러 개를 하나로 묶을 수 있음 (-al)

      예시:

      Bash
      ls -l      # long listing format
      ls -a      # show hidden files
      ls -la     # 두 옵션을 함께
      Bash

      이건 ls -l -a 와 동일함


      3. Long Options (--option 형식)

      항목설명
      형식-- + 전체 이름 (--help, --version)
      특징가독성이 좋고 의미가 명확
      조합 가능 여부묶을 수 없음. 각 옵션은 개별적으로 지정해야 함

      long option 예시:

      Bash
      ls --all           # 숨긴 파일도 보여줌
      ls --format=long   # 출력 포맷 설정
      rm --recursive     # 디렉토리도 재귀적으로 삭제
      Bash

      short/long 비교 예:

      Bash
      grep -i "text" file.txt       # -i = ignore case
      grep --ignore-case "text" file.txt  # 동일한 기능, long option 사용
      Bash

      4. 어떻게 구현되는가?

      각 명령어 도구에서 내부적으로:

      • getopt() 또는 getopt_long() (GNU 확장) 함수로 처리
      • ls, grep, cp, rm 등 GNU coreutils는 대부분 short + long 옵션 둘 다 지원

      5. 옵션 사용 도움말 보기

      Bash
      ls --help
      grep --help
      Bash

      또는:

      Bash
      man ls
      man grep
      Bash


      6. 요약

      구분Short OptionLong Option
      형식-x--option
      가독성낮음높음
      조합 가능여러 개 묶기 가능 (-al)묶을 수 없음 (--a --b)
      사용 목적빠르고 간결한 입력명확한 의미 전달

      find

      Bash
      find . -name "*.c" -exec ls -l {} \;
      Bash

      (단, 이건 한 번만 실행되는 게 아니라, .c 파일 하나하나마다 ls -l이 실행됨)

      확장된 예시

      🔁 모든 .c 파일을 한 번에 전달하고 싶을 때

      Bash
      find . -name "*.c" -exec ls -l {} +
      Bash
      Bash
      find . -name "*.c" | xargs ls -l
      Bash

      +는 여러 개의 결과를 한 번의 명령으로 전달

      즉, 아래처럼 실행됨:

      Bash
      ls -l file1.c file2.c file3.c ...
      Bash

      성능면에서 훨씬 효율적 (프로세스를 여러 번 만들지 않음)

      하나 더 개선:

      Bash
      find . -name "*.c" -exec ls -l {} + 2> /dev/null
      Bash

      에러 출력을 버림

      Bash
      find . -name "*.c" | xargs ls -l
      Bash
      • xargsfind의 출력값을 인수로 변환해 ls -l에 전달
      • 단, 파일명이 공백/특수문자를 포함할 경우 오류 발생 가능

      → 해결책: 공백 처리하려면 -print0xargs -0 조합 사용:

      Bash
      find . -name "*.c" -print0 | xargs -0 ls -l
      Bash

      Linux Package Managers

      • yum
      • apt : ubuntu
        • sudo apt update
        • sudo apt-get install
        • sudo apt-get remove
        • apt-cache search keyword
        • apt-cache show aptitude
      • apk : alpine

    8. Useful vscode extensions

      0. Introduction

      There are so many extensions in vs code.

      In this document, let me introduce some useful vscode extensions

      1. Prettier – Code formatter

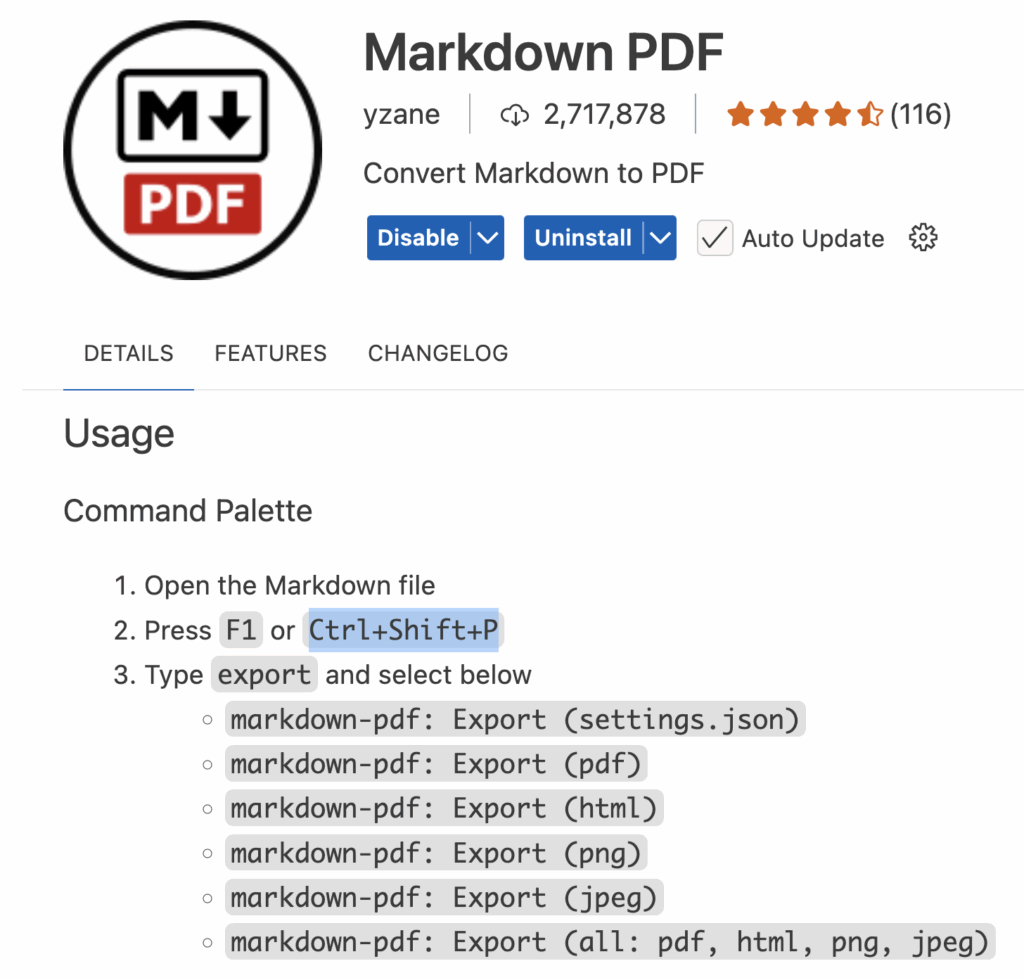
      2. Markdown PDF

      • Markdown 문서를 Ctrl+Shift+p 단축키 후 PDF변환 실행

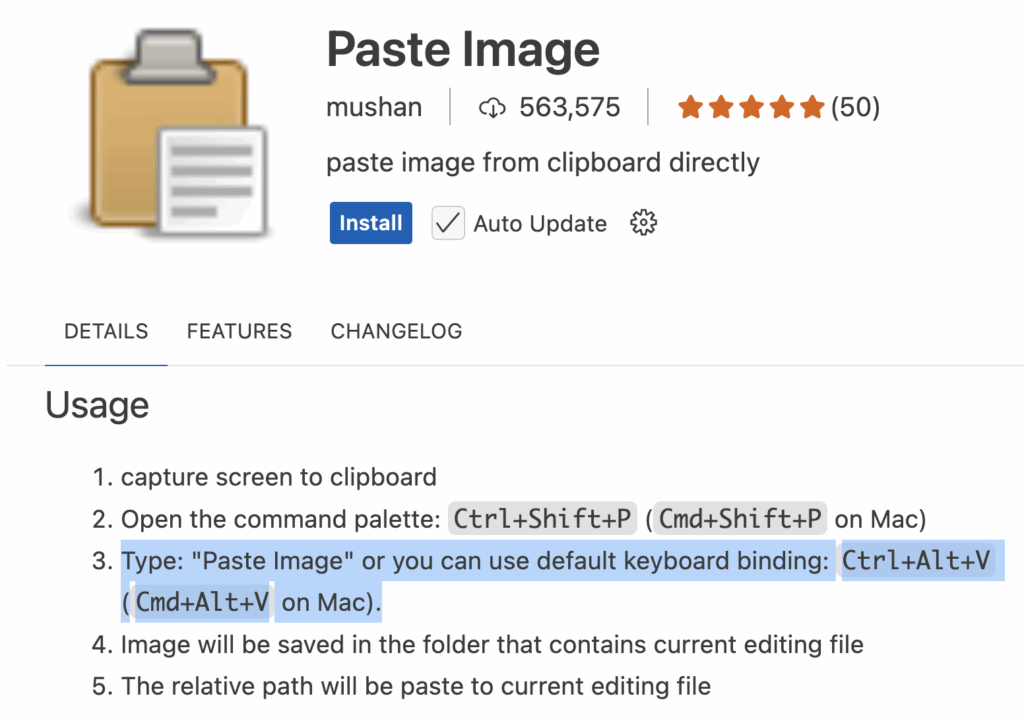
      3. Paste Image

      • Markdown 문서에 Ctrl+Alt+v단축키로 이미지 첨부

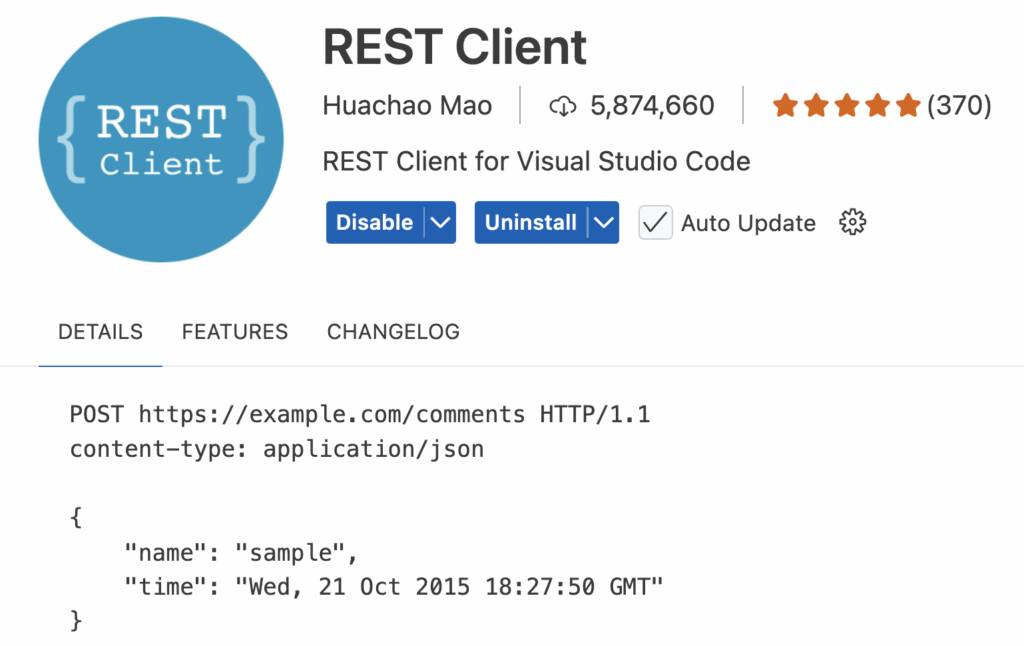
      4. REST Client

      • POST 요청 등을 처리

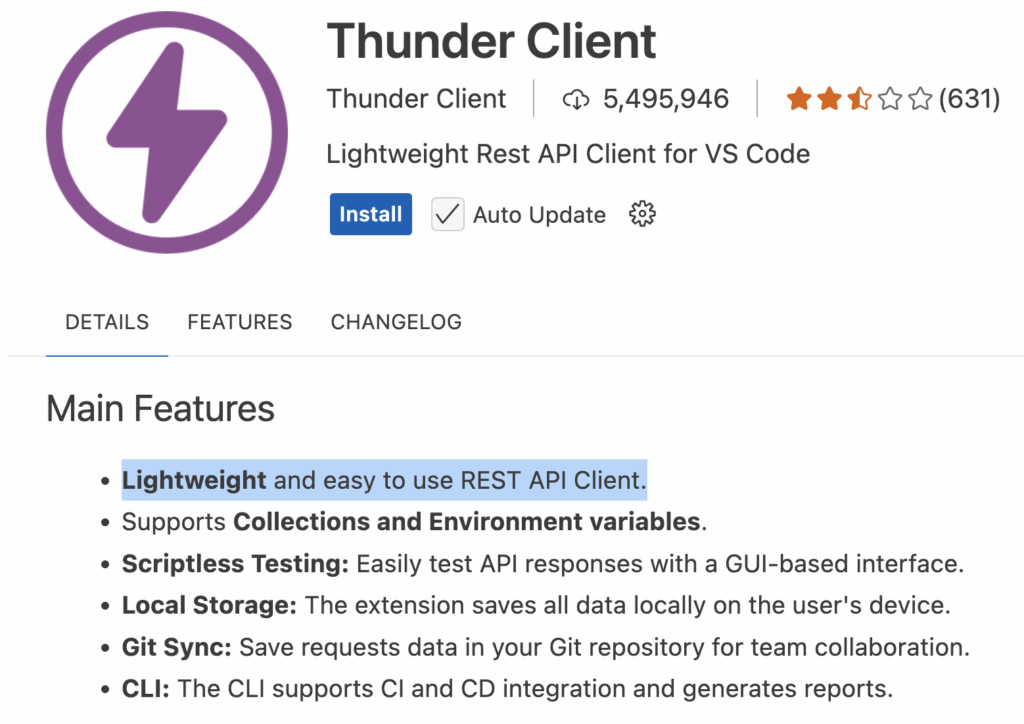
      5. Thunder Client

      • POST 요청 등을 처리 (GUI)

    9. Linux – Process

      1. 프로세스란?

      • 실행중인 프로그램을 프로세스라고 부름
      • 하나의 프로그램에서 여러개의 프로세스 실행이 가능
      • 리눅스 커널은 프로세스를 process id로 구분


      2. 부모-자식 프로세스 관계

      • 모든 프로세스는 부모 프로세스로부터 파생
      • init 또는 systemd가 대부분의 프로세스의 최상위 부모
      • 자식은 부모 종료 시 init이 대신 관리
      • 부모 PID: PPID : parent pid
      Bash
      ps -eax -o pid,ppid,cmd
      Bash


      3. 프로세스 관련 명령

      • ps : process status
      Bash
      ps
      ps aux          # 모든 사용자의 프로세스 보기
      ps -ef          # 전체 포맷 출력
      Bash
      Bash
      $ ps -eaf
      UID          PID    PPID  C STIME TTY          TIME CMD
      root           1       0  0 Apr28 ?        00:00:59 /sbin/init
      root           2       0  0 Apr28 ?        00:00:00 [kthreadd]
      root           3       2  0 Apr28 ?        00:00:00 [rcu_gp]
      root           4       2  0 Apr28 ?        00:00:00 [rcu_par_gp]
      root           5       2  0 Apr28 ?        00:00:00 [slub_flushwq]
      
      root         928       1  0 Apr28 ?        00:00:00 /usr/sbin/vsftpd /etc/vsftpd.conf
      Bash
      • pstree
      Bash
      pstree
      pstree -p
      Bash
      Bash
      $ pstree -p
      systemd(1)─┬─ModemManager(973)─┬─{ModemManager}(1013)
                                    └─{ModemManager}(1034)
                 ├─agetty(974)
                 ├─containerd-shim(2237)─┬─sh(2307)───npm run 
                 
      ......
                 
                 ├─systemd(286541)───(sd-pam)(286542)
                 ├─systemd-journal(518)
                 ├─systemd-logind(908)
                 ├─systemd-network(864)
                 ├─systemd-resolve(866)
                 ├─systemd-timesyn(812)───{systemd-timesyn}(820)
                 ├─systemd-udevd(564)
                 ├─thermald(913)───{thermald}(983)
                 ├─udisksd(914)─┬─{udisksd}(950)
                               ├─{udisksd}(954)
                               ├─{udisksd}(1029)
                               └─{udisksd}(1107)
                 ├─unattended-upgr(1000)───{unattended-upgr}(1075)
                 ├─upowerd(9078)─┬─{upowerd}(9080)
                                └─{upowerd}(9081)
                 └─vsftpd(928)
      Bash
      • kill : 프로세스로 시그널 보내기
      Bash
      kill -9 pid
      Bash
      • top : 프로세스 목록을 실시간 모니터링
      Bash
      top
      Bash
      • pidof : 프로세스이름으로 PID찾기
      Bash
      pidof nginx               # nginx 프로세스 PID 찾기
      ps -eaf | grep nginx      # nginx 프로세스를 문자열로 필터
      Bash
      • 터미널에서 단축키 사용
        • Ctrl + z,
        • jobs
        • bg : switch to background
        • fg : switch to foreground


      4. 프로세스 권한

      • 리눅스에서 각 프로세스는 User와 Group속성을 가짐
      • 이러한 정보는 커널이 다음을 판단하는 데 사용:
        • 어떤 자원(파일, 디바이스, 포트 등)에 접근 가능한가
        • 어떤 프로세스를 제어(kill, attach 등)할 수 있는가
      • root 계정의 쉘 프롬프트는 #
      • 일반 계정의 쉘 프롬프트는 $


      5. 프로세스 권한 관련 명령

      • ps로 권한정보 조회
      Bash
      ps -o pid,user,uid,euid,egid,cmd -p PID
      Bash
      • id, whoami
      Bash
      id
      whoami
      Bash


      6. su, sudo

      • su : run a command with substitute user and group ID
      Bash
      su - danny
      su -l
      Bash
      • sudo : execute a command as another user
      Bash
      sudo vi /etc/shadow
      sudo su -
      Bash